The first step is to add the Internet Information Services and related components. First, the Server Manager (Windows Server 2012 standard component) must be started.
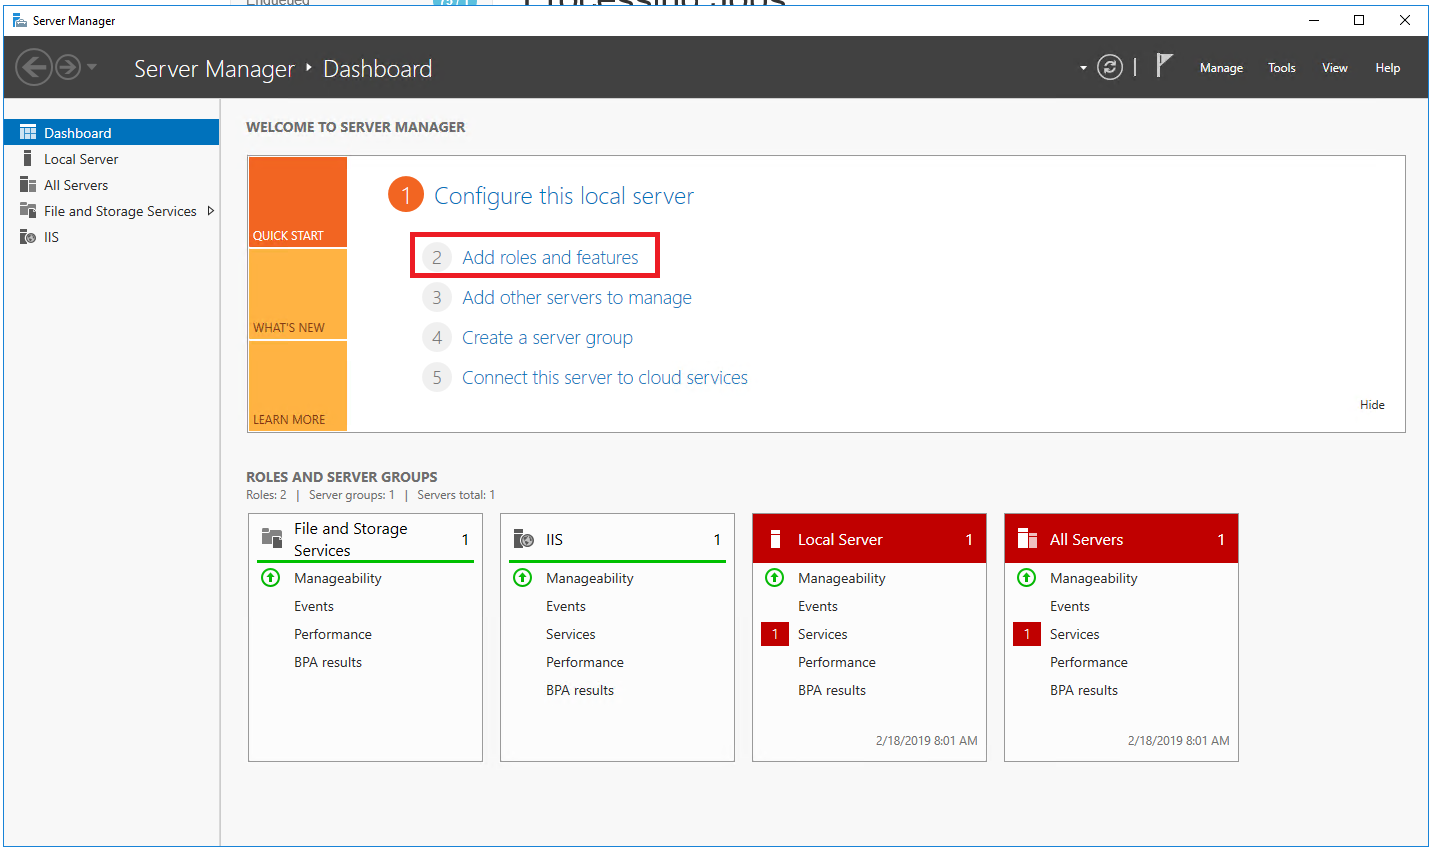 Image Modified Image Modified
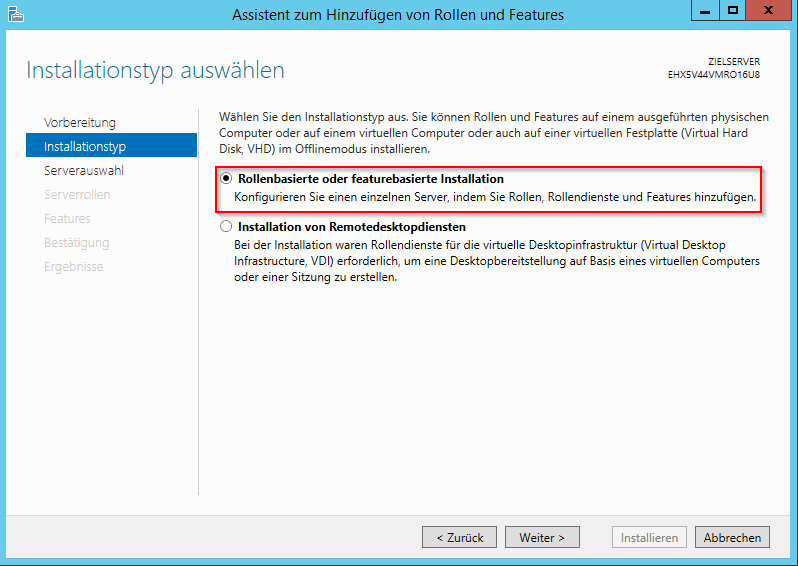
Roles and features can be added in the Quick Start menu item. In the opening menu, the first item can be skipped with Continue. When selecting the installation type, the role-based or feature-based installation must be selected and confirmed with a click on Next.
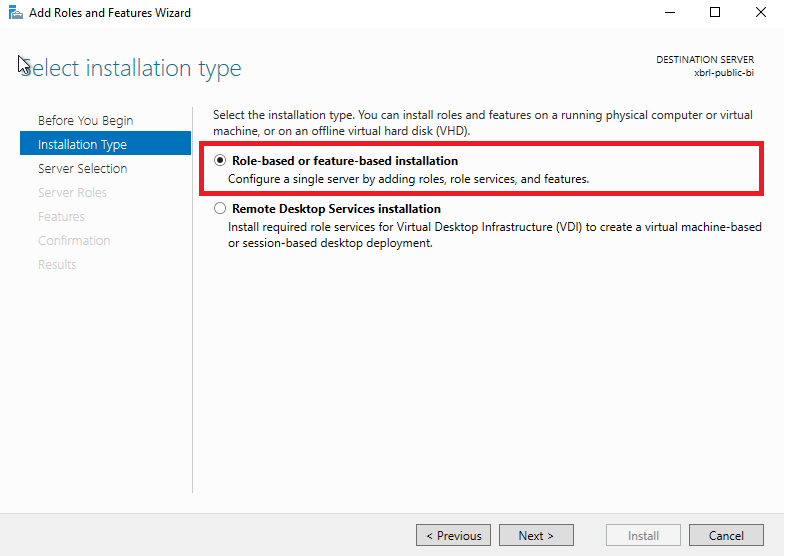 Image Modified Image Modified
The target server must be selected in the following dialog for server selection. If the server manager is started on the target system, it matches the local server.
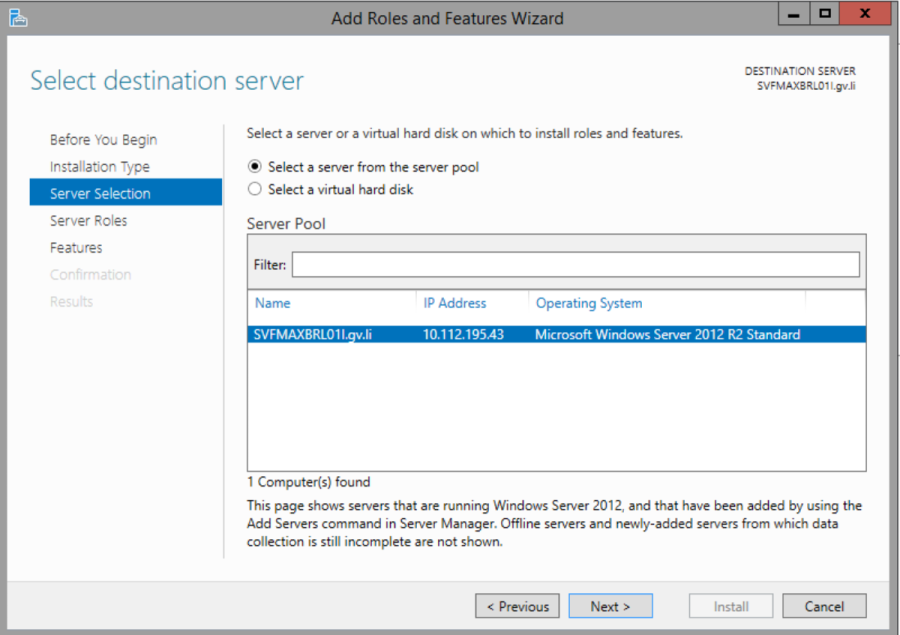 Image Modified Image Modified
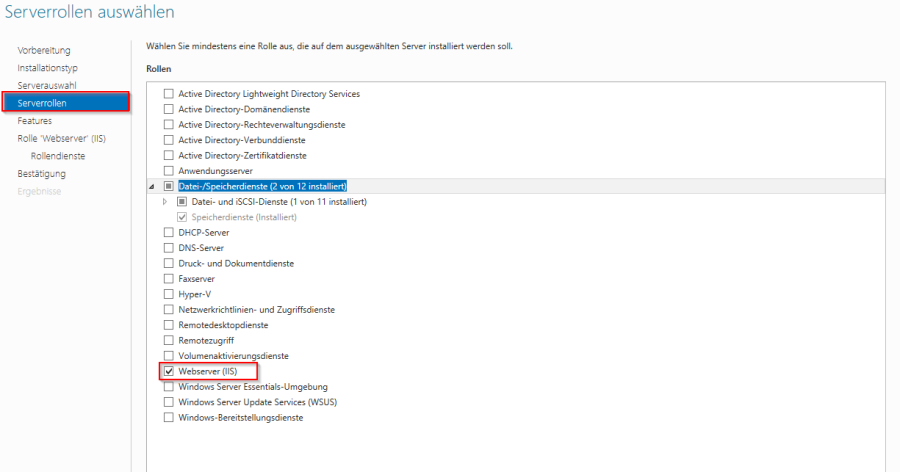
In the next step server roles can be selected. Here the role Webserver (IIS) must be selected and confirmed with Next. 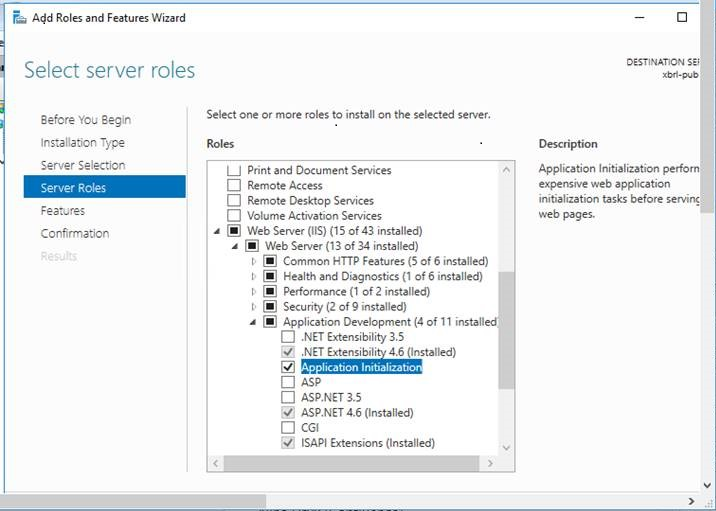 Image Modified Image Modified
New: In this dialogue the "Management Service" must be installed to get IIS Web Deploy working. 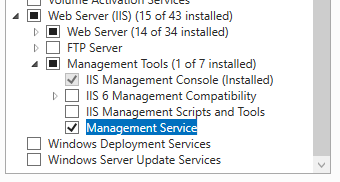 Image Added Image Added
In the next step, additional components can be added in the Features menu. The following items must be selected here: - NET Framework 4.5 Functions
- .NET Framework 4.5
- ASP.NET 4.5
- WCF services
- HTTP activation
- TCP activation
A click on Next confirms the selection of these features. 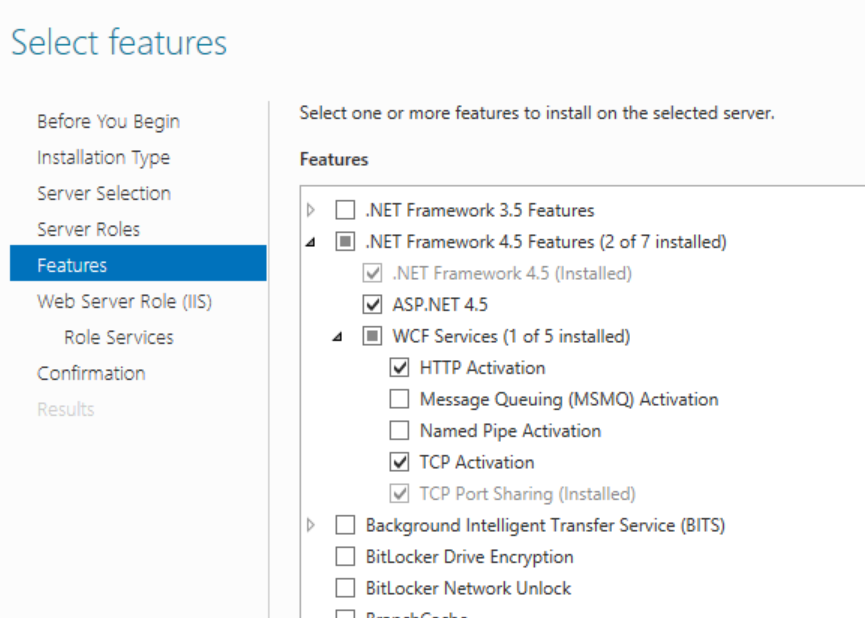 Image Modified Image Modified
Additional role services can be selected in the following menu for the Web Server (IIS) server role. In particular, the following services must be selected here: - General HTTP features
- HTTP error
- Standard document
- Static content
- Search directory
- HTTP redirection
- Security
- Application development
- .NET extensibility 4.5
- Application initialization
- ASP.NET 4.5
- ISAPI Enhancements
- ISAPI filter
- ISAPI-Filter
This selection can now also be confirmed with a click on Next. In the following dialog an overview of the selected roles and features is displayed again. If everything is correct, it must be confirmed again. The new features will then be installed. This may take a few minutes.
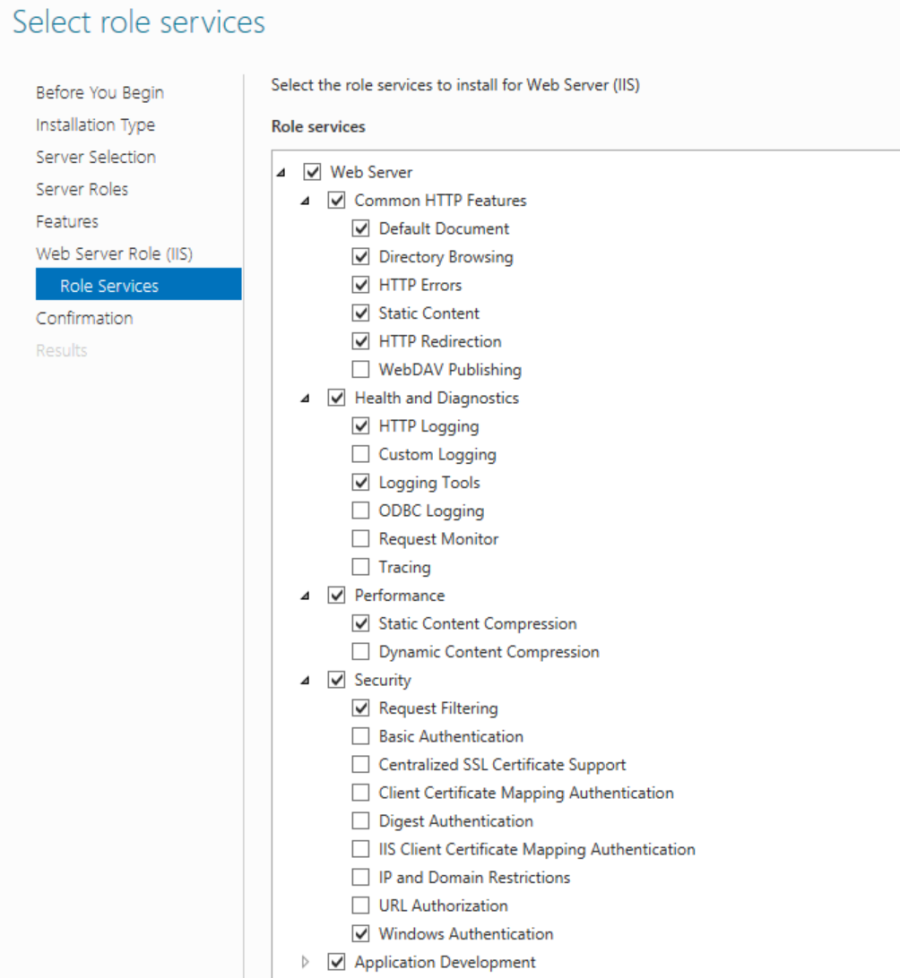 Image Added Image Added
| 


